TL;DR

Turn quiet afternoons into listening time
- Thousands of audiobooks, podcasts and originals
- Listen on your phone, tablet or Echo — also offline
- Cancel anytime
Before installing a grab bar in a tiled shower, plan its position around the person who will use it and confirm that the fasteners can reach studs, blocking, or another suitable support. Tile and grout are finishes, not structural anchors; use hardware and sealing methods approved for the wall and bar, and ask a qualified installer to assess uncertain walls.
A grab bar can look solid as a ship’s rail and still pull loose if its screws only grip tile or drywall. The quiet detail behind the shiny surface matters most: what the bar is anchored to.
If you are planning a tiled-shower installation, you need to think about two things together: where the person can comfortably reach and what the wall can securely hold. A bar meant to steady someone entering the shower may belong near the opening; one used while standing or rising from a seat may need a different position.
This guide walks you through placement, wall construction, drilling, sealing, and product choice in plain language. You’ll also see when a do-it-yourself installation may be reasonable and when a qualified installer can help. A little planning before the first hole can make the finished shower both more useful and more dependable.
Plan placement around the user’s reach and the task the bar will support, such as entering or rising from a seat.
Tile and grout are finishes, not structural support; confirm suitable backing behind the mounting points.
Follow the bar maker’s instructions for wall type, fasteners, mounting, and sealing.
Treat a load rating as one part of the installation assessment, not proof that any wall can support the bar.
Ask a qualified installer to assess uncertain wall construction, difficult tile, or mounting points that do not align with support.
Grab Bars in Tiled Showers Plan for Safe Support
A useful grab bar must be within the user’s reach and securely anchored behind the tile. The wall, fasteners, and installation method all matter.
Start with the person
Choose a position for a real shower task and test the reach before drilling.
Stepping in
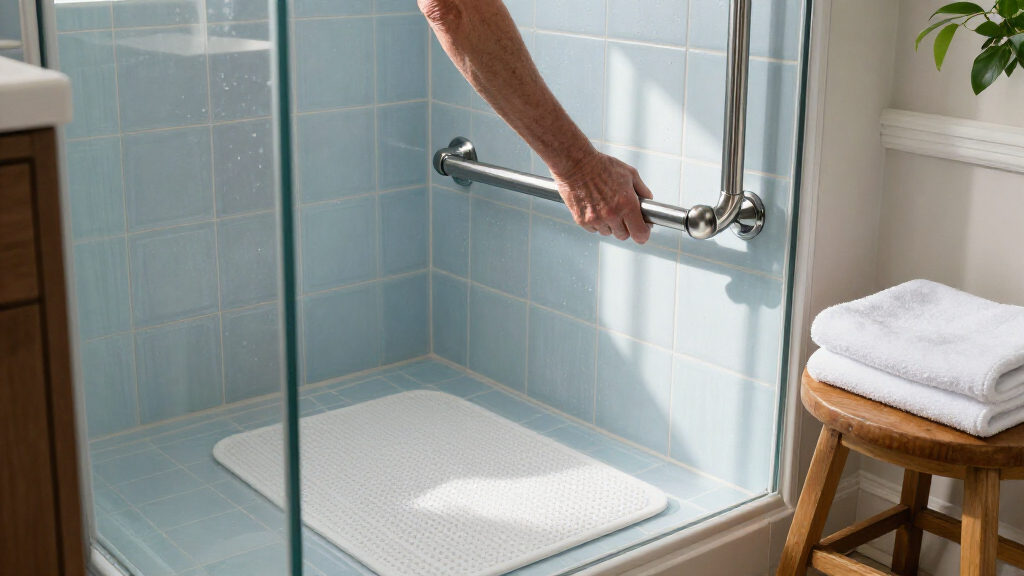
A vertical bar near the opening may help someone steady themselves while entering.
Rising or sitting
Place support within comfortable reach from the shower seat.
Check grip and clearance
Leave room for the hand and avoid blocking doors, seats, or movement.
What holds the bar?
Tile and grout are finishes; confirm the support behind them.
- Wall studs
- Suitable blocking behind the wall
- Other approved method matched to the wall and product
- Tile alone
- Grout alone
- Drywall alone
Before the first hole
Check the user’s reach and the wall together before choosing a mounting point.
Use painter’s tape and test the reach in the posture where the bar will be used.
Identify what is behind the tile; a stud finder reading may be uncertain.
Match the fasteners and mounting method to the wall and bar.
Use a tile-appropriate bit and seal penetrations as specified.
When to get help
Ask a qualified installer when the wall or mounting points are uncertain.
- Wall construction is unknown or support cannot be confirmed.
- The tile is difficult to drill, or the bar does not line up with framing.
- Installation may require opening and repairing the wall.
- Check local requirements for rental properties or public facilities.
Start with the person’s reach, not a standard layout
Before installing a grab bar in a tiled shower, decide what movement the bar should help with and where the user can reach it without twisting or stretching. A useful position depends on the person’s height, balance, mobility, and the shower’s layout; one standard arrangement won’t suit everyone.
For example, a person who feels unsteady stepping over a tub edge may benefit from a vertical bar near the entrance, where a hand can find it before the foot lifts. Someone who sits on a shower bench may need a horizontal bar within comfortable reach from the seat. These tasks call for different positions, even in the same bathroom.
Watch the person move through the shower area, if they can do so safely. Notice where they naturally reach when stepping in, turning, standing, or rising from a seat. A strip of painter’s tape can mark a possible bar location so the user can try the reach before anyone drills. Keep this planning conversation respectful: ask what feels helpful instead of choosing for the person.
Current accessibility thinking emphasizes individual placement, not a one-size-fits-all height. Guidance for accessible buildings can offer a starting point, but residential needs and local requirements vary. If the shower is in a rental or public facility, check applicable local rules before deciding on a layout.
Popular right now

Ninja Luxe Café Mini Espresso and Drip Coffee Machine, Stainless Steel, ES301

Breville Barista Express Espresso Machine with Built-In Grinder, Brushed Stainless Steel

KitchenAid Artisan Series 5-Quart Tilt-Head Stand Mixer with Pouring Shield, Cherry Tomato
As an affiliate, we earn on qualifying purchases.
Choose a bar position that helps with a real shower task
Place each grab bar where it supports a specific action, such as entering, standing, turning, or rising from a seat. The job determines the position: a bar for entry may be vertical near the opening, while one for support during a seated shower may need to sit within easy reach of the seat.
Before drilling, talk through the person’s shower routine and mark candidate locations with painter’s tape. Ask them to reach from the position where they will use the bar, not just from the bathroom floor. For instance, a bar that seems reachable while standing outside the shower may be awkward once the user is seated behind a curtain or facing the opposite wall. Testing the reach in the actual posture reveals whether the hand can find the bar without a destabilizing lean. If the user’s needs change, a layout chosen only for today’s routine may become less useful, so consider likely changes in mobility too.
Think about clearance as well as reach. A hand needs room between the bar and wall, and the bar should not block a door, collide with a shower seat, or sit where a moving person could bump into it. A smooth, easy-to-grasp surface can matter when hands are wet. Comfortable grip and clear access make a bar more useful than a position chosen only for appearance. More clearance can improve grip, but the bar still needs to fit the available wall and avoid nearby fixtures; a compromise that makes the hand awkward or obstructs movement defeats the purpose.
There is no single layout that fits every shower. The person’s reach, the location of the plumbing, the seat, and the wall construction all shape the plan. If the best hand position does not line up with a stud, pause and consider a suitable alternative or ask an installer to assess the wall before making a hole. Moving the bar slightly may preserve secure attachment, but only if it remains reachable for the same task; a convenient stud location is not useful if it places support out of reach.
Check what sits behind the tile before choosing anchors
A grab bar must connect to solid support behind the tile, such as a suitable wall stud or installed blocking, so the mounting points can carry the intended load. Tile and grout form the finished surface; by themselves, they are not a dependable structural anchor for a weight-bearing grab bar. When someone grabs a bar to steady themselves, the force can be sudden and may pull outward as well as downward. A finish layer is not designed to transfer that force into the framing.
A tiled shower wall may hide several layers: tile, backer board, and framing, for example. Another wall could have different construction. That is why a bar’s advertised load rating alone does not tell you whether the finished installation will be secure. The bar, fasteners, and wall support work as a system. If any part is unsuitable, the rated capacity of the bar cannot make up for it; this is why product instructions for wall type and fastening matter as much as the number on the package.
A stud finder may help locate framing, but tile, backer board, and moisture can make readings uncertain. If you cannot confirm what is behind the proposed mounting points, don’t treat a guessed stud location as a fact. A professional can assess an unfamiliar wall and discuss whether blocking, another approved anchor method, or opening and repairing the wall is appropriate. Opening a wall may add repair work, but it can clarify the structure and allow support to be placed where the user can actually reach it.
Imagine finding a stud at one end of the bar but not the other. The mounting plan still needs to match the product instructions and provide sound support for its mounting points. Before buying hardware, identify the wall type and compare it with the manufacturer’s instructions. If you are planning a remodel, ask about adding blocking before the tile goes up; it can make later placement simpler. Planning that support early can preserve more options for bar position, while a finished tiled wall may constrain placement or require more involved retrofit work.
Drill and seal the tile with care
Drill through tile with a tile-appropriate bit and careful technique, then seal each penetration as specified for the installation. Tile can crack if the bit or drilling approach is unsuitable, while an unsealed hole can allow water to reach the wall behind the finish. A crack can spread beyond the mounting point and leave the bar less securely seated; water getting behind tile can damage hidden materials over time, even when the surface looks fine.
Follow the grab bar maker’s instructions for fasteners, mounting, and stated load rating. The right hardware depends on the wall material and installation method, so do not assume that a screw supplied with one product suits every tiled shower. Take time to confirm the mounting points before drilling; a misplaced hole can leave a visible scar and may complicate the seal. Drilling only after checking support and position may take longer, but it reduces the chance of having to patch a hole that cannot safely be used.
For example, if you are fitting a bar near a shower entrance, check that its marked holes line up with suitable support and that the bar will not interfere with the door or curtain. Then use the drill bit and sealing method specified for the tile and wall assembly. Waterproofing details matter because the finished wall faces regular splashes and steam. A seal that suits one wall assembly may not suit another, so following the specified method helps protect the layers behind the tile without compromising the fastening.
If the tile is difficult to drill, you cannot identify the backing, or the bar’s holes do not align with solid support, stop and get qualified help. An installer can judge whether a different bar position, approved anchoring method, or wall repair is needed. Careful planning protects both the tile and the wall hidden behind it. The choice may involve balancing repair work against placement: shifting the bar can avoid opening the wall, but only if the new location still supports the user’s movement and the mounting system.
Pick a bar for grip, clearance, and its stated use
Choose a purpose-built grab bar with a grip the user can comfortably hold, enough room for their hand between bar and wall, and clear installation instructions for the planned wall. Match the bar to the user and the wall, rather than choosing by finish alone. A bar that looks coordinated but is difficult to grasp may go unused, while a bar with suitable grip and support is more likely to help when needed.
Bathroom fixtures now come in a range of finishes and shapes, so a safety bar can coordinate with the shower without being mistaken for a towel rail. That visual choice still comes after fit and installation. A sleek bar that leaves too little room for a wet hand may be harder to grasp than a straightforward model with more clearance. The practical tradeoff is easy to check in person: have the user try the grip if possible, then make sure the chosen shape also fits the intended position and mounting points.
Read the product’s stated rating and intended use alongside its mounting instructions. A rating is only one part of the assessment; it does not confirm that a particular wall and fastener combination will support the intended use. In a practical example, two bars may look similar on a store shelf, but only one set of instructions may match the wall material and available support in your shower. Choosing the compatible product can narrow the style options, but it avoids treating appearance or a high rating as a substitute for a suitable installation.
Be careful with towel bars and suction-cup accessories. Do not treat them as weight-bearing grab bars unless the product is specifically designed and installed for that purpose. Some suction-cup models may be intended as temporary balance aids, but generally should not be relied on to catch a fall or bear full body weight. Check the exact instructions and ask a qualified professional if the intended use is unclear. This distinction matters because a light aid for balance may not be built to withstand the force of someone catching themselves during a slip.
Use this checklist before making the first hole
Before installing a grab bar in a tiled shower, work through a short checklist: identify the user’s task, mark a reachable position, confirm the wall support, and match the hardware and sealing method to the product instructions. Each step reduces a different kind of guesswork. Together, they also help expose conflicts early: the best reach location may not match the available backing, or the preferred bar may not suit the wall.
- Name the task. Decide whether the bar will help with entry, standing, turning, or rising from a seat. For example, a bar for stepping over a tub edge has a different job from one beside a shower bench. This keeps the plan focused on the movement the user needs help with.
- Mark and try the position. Use painter’s tape and let the user check the reach from the position where they will use the bar. Adjust if they need to twist or stretch. Testing in context matters because posture, a curtain, or a seat can change what seems reachable from outside the shower.
- Confirm the wall construction. Find out whether suitable studs, blocking, or another approved support is available at the mounting points. If the wall is uncertain, get help assessing it. This step determines whether the proposed location can be attached securely or whether the layout or wall needs to change.
- Match the product and hardware. Check the manufacturer’s instructions for fasteners, wall type, mounting, and load rating. A stated rating cannot make an unsuitable anchor safe. The right match makes the bar and wall work together as intended.
- Plan drilling and sealing. Use a tile-appropriate bit and seal penetrations as specified. If the tile is difficult or the holes do not align with support, pause before drilling. A careful pause can prevent cracked tile or a hole that is difficult to seal and cannot be used.
This sequence also helps you spot a problem while it is still easy to change the plan. A small shift in position or a conversation about adding blocking during a remodel may prevent a rushed decision after the tile is already marked. The best adjustment is one that resolves the installation issue while preserving a comfortable reach for the user.
Call an installer when the wall or plan is uncertain
A qualified installer can help when you cannot confirm the wall structure, the tile is difficult to drill, the mounting points do not line up with framing, or installation may require opening and repairing the wall. Uncertainty about the anchor is a good reason to pause, especially when someone will rely on the bar for support. An installer’s assessment can identify whether the issue is simply locating the support or whether the proposed position and wall assembly need a different solution.
Ask the installer to explain what is behind the tile, how the bar will attach, and how the holes will be sealed. You can also ask how the proposed placement supports the user’s actual shower routine. For example, if the user relies on a seat, the conversation should include whether the planned bar can be reached comfortably from that seat. These questions connect the hidden construction to the everyday use, so you can understand why a proposed location or method makes sense.
Professional help does not remove the need to choose a useful position. The installer can assess structure and installation, while the user can explain where support is needed. When both perspectives shape the plan, you are more likely to get a bar that feels natural to use and is attached as intended. If they reveal a conflict—such as a convenient reach point with no suitable backing—the solution may mean adjusting the layout or altering the wall rather than accepting a poorly placed bar.
Planning during a remodel can make the job easier: blocking may be added behind the wall before tile is installed. Retrofit options also exist, but their suitability depends on the product, wall, and anchoring method. For a rental, public facility, or other regulated setting, verify local building and accessibility requirements rather than assuming a residential recommendation applies. Early planning can leave more flexibility in where support is placed; after tile is installed, gaining that flexibility may involve more time and repair work.
Frequently Asked Questions
Can I install a grab bar directly into tile?
You can drill through tile, but the bar needs a secure connection to suitable support behind it. Tile alone is not a reliable structural anchor. Match the fasteners and method to the wall and the manufacturer’s instructions.
Do shower grab bars have to attach to studs?
Studs and installed blocking are common secure attachment points. Other methods may suit particular walls and products, but they must follow the manufacturer’s instructions and support the intended use. If you cannot confirm the wall construction, ask a qualified installer to assess it.
How do I find studs behind shower tile?
A stud finder may help, but tile, backer board, and moisture can make its readings unreliable. Confirm framing carefully before drilling. If you are unsure, an installer can assess the wall rather than relying on a guess.
Where should a shower grab bar go, and how high should it be?
Place it where the user can reach it comfortably for the task it supports, such as stepping into the shower or rising from a seat. A taped outline can help someone try the reach before drilling. Accessibility guidance may offer a starting point, but the user, shower layout, and local requirements matter.
Can I use a suction-cup grab bar in the shower?
Some suction-cup models may serve as temporary balance aids, but generally should not be relied on to catch a fall or bear full body weight. Check the product’s stated purpose and instructions, and do not treat it as a weight-bearing grab bar unless it is designed and installed for that use.
Can drilling crack tile or cause a leak?
It can if the drilling approach is unsuitable or a hole is left unsealed. Use a tile-appropriate bit and seal each penetration as specified for the installation. If the tile is difficult to drill, a qualified installer can help protect the tile and wall.
Should I hire a professional to install a grab bar?
Consider a qualified installer if you cannot confirm the wall support, the mounting points do not line up with framing, or the tile is difficult to drill. Professional help is also useful when the work needs wall opening or repair. Ask how the bar will be anchored and how its holes will be sealed.
Conclusion
Choose the position by watching what the person needs to do, then confirm that the wall can support the bar with the installation method the manufacturer specifies. Reach and anchoring belong in the same plan; a convenient location is only useful when the attachment is suitable.
Mark the spot, check the support, and pause if the wall remains a mystery. A well-planned grab bar should feel like a steady hand exactly where you need one.