
TL;DR

Turn quiet afternoons into listening time
- Thousands of audiobooks, podcasts and originals
- Listen on your phone, tablet or Echo — also offline
- Cancel anytime
Place grab bars where the bathroom user can grasp them before and during movements such as entering a tub, bathing from a seat, or standing from a toilet. The right location and orientation depend on the person, the fixture, and the wall structure; secure anchoring matters as much as the bar itself. A qualified professional can help assess placement and local requirements.
A grab bar can be in plain sight and still be useless if you have to lean or twist to reach it. Think of planning one like placing a handrail along a path: it needs to meet your hand at the moment you need support.
This guide helps you decide where support is needed, whether a horizontal, vertical, or angled bar may suit the movement, and what to check before installation. The aim is a useful guide for your actual bathroom, not a one-size-fits-all layout. A grab bar can support bathing, standing, and transfers, but it does not make a bathroom fall-proof.
Start with the person who will use the room. A person who steps over a tub edge needs different support from someone who transfers from a wheelchair or sits on a shower seat. Their reach, balance, and preferred side all matter.
Map the user’s movements before deciding where each bar goes.
Position bars where the person can grasp them before and during the task.
Match bar direction to the movement and the user’s comfortable grip.
Use secure mounting designed for the wall and intended use; a towel bar is not a substitute.
Check the full bathroom route, and consult a qualified professional when placement, transfers, or wall construction are uncertain.
Place Grab Bars Where Support Is Needed
Plan each bar around the person’s reach and movement. A useful handhold is reachable before and during the task, and securely anchored for its intended use.
Map the movement first
Watch how the user enters, sits, stands, bathes, or transfers, then check proposed positions with them when possible.
Include stepping in, bathing, sitting, standing, and transfers.
Note where the user reaches, pauses, or changes balance.
Check the grip from the position where support is needed.
Match the bar to the task
Different directions can suit different movements; no one orientation works for everyone.
Vertical bar
May be easier to grasp while stepping into or out of a tub or shower.
Horizontal bar
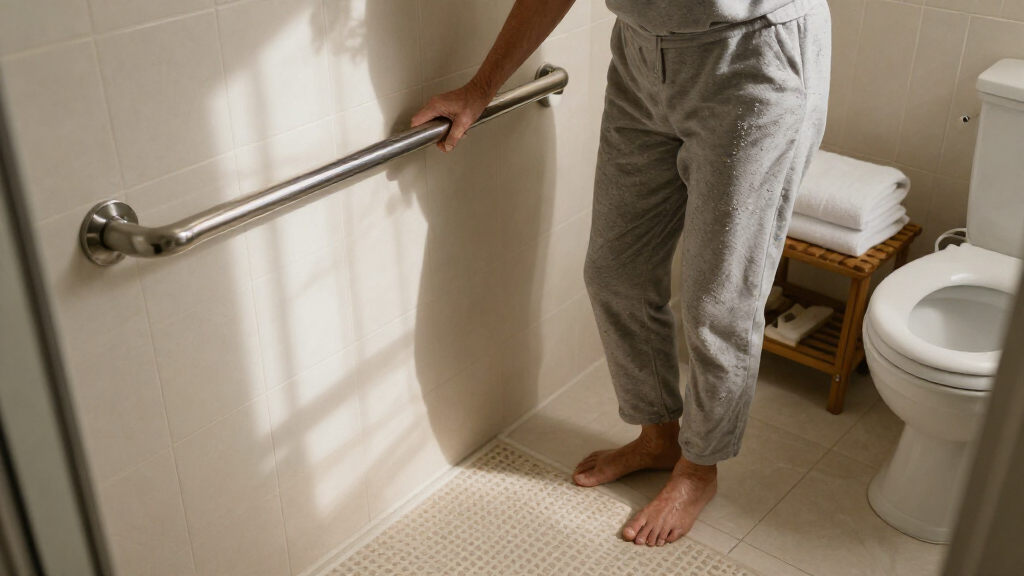
Can offer a steady hold along a wall while standing or bathing.
Angled bar
May suit some transfers when its angle matches the user’s grip and movement.
Check support across the bathroom
The user’s position, reach, and transfer direction should guide where each handhold goes.
| Area | Planning focus |
|---|---|
| Tub or shower entry | Reach support before stepping over the edge. |
| Shower seat | Make bars, controls, and handheld showerhead reachable while seated. |
| Toilet | Consider bars beside or behind it, guided by reach and transfer needs. |
Make installation secure
Choose bars designed for the purpose and mounting suited to the wall and intended loads.
- Structural support or a rated mounting system
- Clear access to controls, doors, and transfers
- Wall material and installation method
- Using a towel bar as a handhold
- Assuming a standard layout fits every user
- Drilling when wall support is uncertain
Start with the movement, then mark where support belongs
Where to place grab bars in a bathroom depends first on the movement the person needs help with. Watch how they approach the tub, sit down, stand up, or move to a shower seat, then identify where a handhold would be useful before and during each action. This gives you a practical planning method built around the person rather than a generic diagram.
For example, imagine someone who holds the sink while stepping into a tub. That habit points to a support gap near the tub entrance, but the sink is not a weight-bearing handhold. Ask the person to show their usual movement at a safe pace, and note where they reach, pause, or turn. If standing is tiring, consider the whole route, including reaching controls and sitting down.
When possible, have the intended user test a proposed bar position before you mark the wall. They should be able to reach it without stretching, twisting, or changing their balance suddenly. A position that works for a tall visitor may leave a shorter user reaching upward. If transfers involve a wheelchair or another person’s assistance, an occupational therapist or accessibility specialist can assess the movement in the actual room.
Write down the tasks that matter: entering, bathing, sitting, standing, and transferring. Then mark where the person needs support for each one. A small sketch can help you see whether one bar serves several movements or whether different areas need their own support.
Popular right now

Shark AI Ultra Robot Vacuum, Black/Silver, AV2511AE

KitchenAid 5.5-Qt Bowl-Lift Stand Mixer, Porcelain White (KSM55SXXX)

Hisense 65-inch U6 Pro Mini-LED 4K UHD Smart Fire TV
As an affiliate, we earn on qualifying purchases.
Find useful grab bar locations around a shower or tub
Where to place grab bars in a bathroom shower or tub usually starts at the entry and continues to the spot where the user stands or sits to bathe. A bar near the entrance may help with stepping across the threshold or tub edge, while another position may provide a steady hold during bathing. The fixture, wall construction, and person’s movement determine the exact layout.
Picture a person entering a bathtub: one hand reaches toward the side wall before a foot lifts over the edge. If the bar sits too far inside the tub, they may have to step first and reach second. A vertical bar near the entry may be easier to grasp during that step. A horizontal bar on a side wall may suit someone who needs steady support while standing, but it may not serve every transfer.
Someone who uses a shower seat needs reachable support from the seated position as well as when standing. Check whether they can reach the bar, shower controls, and handheld showerhead without leaning across the wet area. For instance, a person seated near the back wall may not benefit from a bar placed only by the doorway. A second bar may be useful if it supports a separate movement.
These positions are planning examples, not universal measurements. Accessibility standards and building rules can set dimensions for certain settings, while a private home may call for an individualized arrangement. Consider where to place each bar based on the task, and have the user try a safe mock-up before drilling. A mock-up can expose a problem that a floor plan misses: the user may reach a bar while standing but lose contact when turning toward a seat. Each extra bar can provide another stable handhold, but it also needs suitable wall support and should not obstruct controls, doors, or transfers. The goal is coverage through the movement, not simply more bars on the wall.
Choose a bar direction that matches the task
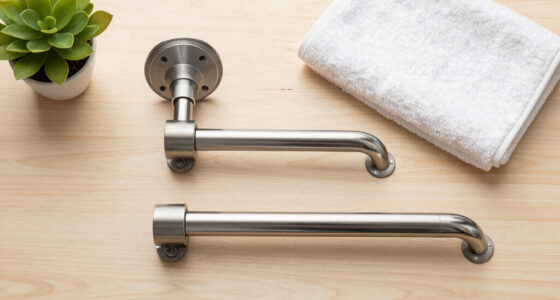
Horizontal, vertical, and angled bars can support different movements, so choose the direction that fits the person’s grip and path. A horizontal bar can offer a steady hold along a wall; a vertical bar can be easier to reach while stepping in or out; and an angled bar may suit some transfers. No direction works for everyone.
For example, a person who needs help pulling to standing may prefer a different grip from someone who needs balance while stepping over a tub edge. An angled bar may feel natural to one user and awkward to another, depending on how they grasp and move. Test the reach and hand position with the person who will use it rather than assuming a standard arrangement will suit them.
It also helps to think about the length and usable grip area. A bar placed where the user can reach only its end may not support the whole movement comfortably. A clear, secure grip matters more than matching the bathroom’s finish. Some bars come in different colors and styles, but appearance should not take priority over a suitable grip and proper installation.
Before choosing a direction, list what the person needs the bar to do: steady a step, support movement along a wall, or help with a transfer. If the task is unclear or several people will use the bathroom, an occupational therapist or accessibility specialist can help assess the layout. The tradeoff is that one bar may serve several actions but offer a comfortable grip for only part of them. For example, a vertical bar can be easy to find at the start of a step, while a horizontal grip may better match a hand that needs to slide along a wall. Where the user changes posture or grip during a transfer, separate bars in complementary directions may be more useful than one bar placed to compromise between tasks.
Place toilet bars where sitting and standing feel steadier
Where to place grab bars in a bathroom near the toilet depends on how the user approaches, sits, and stands. Bars beside the toilet are common, and a bar behind it may also help in some layouts. The user’s reach, dominant side, toilet position, and transfer needs should guide the arrangement.
Imagine someone who uses their right hand to lower themselves onto the seat. A bar placed within comfortable reach on the right may help them control that movement. If the bathroom layout makes that side inaccessible, the user may need a different arrangement. Someone transferring from a wheelchair may need space and support positioned for the direction of the transfer, so a familiar household layout might not fit.
Try the sitting and standing movement in the available space before settling on a bar location. Notice whether the user can find the bar without turning sharply or reaching across their body. A bar behind the toilet may be useful for some people, but a handhold that is hard to reach from the seated position will not help much during a transfer.
To plan carefully, sketch the toilet, nearby walls, and clear approach space. Mark the side the user reaches toward and whether they need support while lowering, rising, or moving to another seat. Exact dimensions may be governed by local requirements in some settings, so check rules that apply to the home or building. The intended movement should shape the layout. Lowering and rising place different demands on a handhold: a position that helps someone control the descent may be poorly placed for pushing up. For wheelchair transfers, bars also need to leave room for the chair and the person’s chosen transfer direction. A layout that seems convenient while standing can block access when the user is seated, so test both positions and the transition between them.
Use this five-step check before choosing final positions
A short walk-through can turn a vague plan into a useful list of bar locations. Follow the person’s actual route through the bathroom, from entering to finishing, and write down where support is needed. This five-step check helps you organize the job before choosing products or drilling into tile.
- List the movements. Note steps such as entering the tub, turning toward a seat, or standing from the toilet.
- Mark the support points. Identify where the user wants a handhold before and during each movement.
- Check reach and direction. Test whether a horizontal, vertical, or angled grip feels comfortable without stretching or twisting.
- Check the wall and surrounding fixtures. Locate likely structural support and see whether controls, doors, and seating remain accessible.
- Confirm the installation plan. Follow the bar maker’s instructions and consult a qualified installer if the wall or mounting method is uncertain.
For example, a household might find that the main problem is not standing in the shower but reaching the controls after sitting down. That changes where support belongs and may also point to repositioning a handheld showerhead or controls. A simple written plan helps keep each choice tied to a real task.
Use this walk-through as a starting point, not a substitute for accessibility rules or professional advice. If several people share the bathroom, plan around the person with the greatest support needs while preserving comfortable access for everyone. The steps are connected: a promising reach point may be unusable if a door blocks it, and a reachable position may not be installable if there is no suitable support behind the wall. Finding that conflict on paper lets you adjust the layout or seek advice before buying a bar or drilling. For shared bathrooms, the needs of one user can shape the layout while still leaving clear access for others; test the arrangement with each regular user where practical.
Make sure each bar is anchored for its intended use
A grab bar must be securely attached to structural support or to a mounting system rated for the wall and intended loads. The finished surface alone, such as tile or fiberglass, does not tell you whether a bar can support a person. Correct placement only helps when the installation can handle the task.
For instance, a tiled wall may look solid but conceal gaps or framing in places that make an ordinary screw placement unsuitable. Drilling in the wrong spot can damage tile and leave the bar loose. A qualified installer can check the wall structure and choose a suitable method, especially when you cannot confirm what sits behind the surface.
Do not use an ordinary towel bar as a substitute. It is generally not designed to bear a person’s weight. Suction-cup bars may be intended for temporary balance assistance, but many are not designed for full-weight support during a transfer or fall. Check the product’s stated purpose, rating, surface requirements, and instructions rather than judging by how firmly it seems to stick.
Some mounting systems are designed for walls without a stud at the desired location, but the system must suit the wall and the intended use. If you are unsure, ask a qualified installer. Secure mounting is part of the safety plan, not a finishing detail, and product claims should be checked against current manufacturer guidance.
Check the whole bathroom so the bars work as a team
Grab bars are one part of a bathroom safety plan, alongside lighting, flooring, thresholds, clutter, controls, and seating. A useful layout helps the person move through the room with fewer awkward reaches, but one well-placed bar cannot fix every hazard. Look at the whole route from the doorway to the shower and toilet.
For example, a person may have a secure bar by the tub but still need to step over a high threshold in a dim room. Brighter lighting, a clear path, or a shower seat may address part of the problem. A non-slip mat or surface may help in some situations, but it should be suitable for the floor and kept in good condition. Keep towels and toiletries where the user can reach them without leaning across a wet area.
Think about the details people often miss: can the seated user reach the shower controls? Does a door swing block access to a bar? Is there enough space for a helper if one is needed? These questions can change placement before installation and make the finished room easier to use day after day.
An occupational therapist, accessibility specialist, or qualified home-modification professional can assess the person’s movements in the actual bathroom. Local building requirements may differ between private homes, rentals, and public or commercial facilities. For someone making changes over time, universal design can help the room remain useful as needs change, while keeping the secure grip and suitable installation at the center.
Frequently Asked Questions
Where should grab bars go in a shower or bathtub?
Start near the entry and at the place where the person stands or sits to bathe. The best locations depend on the user’s movement, the fixture, and the wall structure. A bar should be reachable before and during the movement it supports.
Where should grab bars go around a toilet?
Bars beside the toilet are common, and some layouts also use a bar behind it. Choose positions based on how the person approaches, sits, stands, and transfers, including which side they can comfortably reach. A professional can help assess transfer needs in the actual bathroom.
Should a grab bar be horizontal, vertical, or angled?
It depends on the movement and the user’s grip. Horizontal bars can provide a steady hold along a wall, while vertical bars may help with entering or exiting a tub. An angled bar suits some transfers; test the proposed grip with the intended user.
Can I install a grab bar on tile or fiberglass?
Often, but the wall structure and mounting method matter. Tile or fiberglass alone does not establish that the installation will support the intended use, and drilling incorrectly can damage the surface. Follow the manufacturer’s instructions and consult a qualified installer if unsure.
Are suction-cup grab bars safe, and can I use a towel bar?
Some suction-cup bars are intended for temporary balance support, but many are not designed to bear a person’s full weight during a transfer or fall. Check the product’s stated purpose and rating. Ordinary towel bars generally are not designed to support a person’s weight, so they are not grab bar substitutes.
How high should a grab bar be, and how many do I need?
There is no single height or number that fits every person and bathroom. Specific accessibility standards may set dimensions for some installations, while a home layout should account for the user’s reach and tasks. Assess the shower or tub, toilet, and other movements where support is needed, and check applicable local requirements.
Conclusion
Start with one question: where does the person need a handhold during the movement? Walk through the bathroom with them, test possible reach points, and plan for secure installation before settling on positions.
A well-placed bar should meet the user’s hand as naturally as a familiar railing on a stair. Make the plan around their real movements, then ask a qualified professional to help with uncertain transfers, walls, or local requirements.