
TL;DR

Turn quiet afternoons into listening time
- Thousands of audiobooks, podcasts and originals
- Listen on your phone, tablet or Echo — also offline
- Cancel anytime
Water leak sensors must be strategically placed near appliances, plumbing fixtures, and walls in bathrooms, kitchens, and basements. Correct placement ensures early detection, saving you from costly repairs and mold.
Imagine waking up to a flooded basement or a bathroom floor soaked because a pipe burst overnight. Water damage is one of the most costly home issues—often hitting you where you least expect it. Water leak sensors are your first line of defense, catching drips and leaks before they turn into disasters.
This guide is your practical companion to placing leak sensors smartly in your home’s most vulnerable spots—bathrooms, kitchens, and basements. Get ready for straightforward tips, the latest tech insights, and real-world scenarios that show what works best.
Place sensors near all water sources—toilets, sinks, appliances, and along basement walls.
Use wireless, multi-function sensors that integrate with your smart home for quicker alerts.
Test sensors monthly and replace batteries yearly to keep them reliable.
Position sensors at accessible heights, following manufacturer instructions, to simplify maintenance.
Combine sensor use with regular home inspections for comprehensive water safety.
Water Leak Sensors: A Placement Guide for Bathrooms, Kitchens and Basements
Water rarely announces a problem before it spreads. Strategic sensors near fixtures, appliances and vulnerable walls create an early-warning network that can catch a drip before it becomes structural damage, mold or a flooded room.
Reduction in water-damage costs attributed to early detection and rapid response.
Modern connected sensors can notify you soon after their contacts detect water.
Give each critical fixture, appliance or seepage zone dedicated coverage.
A small preventive expense beside repairs that can reach thousands.
Actual life varies by model, network and alert frequency.
Run a test and confirm that alerts reach the intended phone or hub.
Replace on schedule unless the manufacturer specifies otherwise.
Put detection where water starts—or where it will travel first.
Prioritize hose connections, supply valves, drains and low points. The best location is close enough to catch the first water, but clear of routine splashes and persistent condensation.
Bathroom
- Toilet: behind or beside the base, near the supply line and shutoff valve.
- Vanity: under the sink, below pipe joints, traps and flexible hoses.
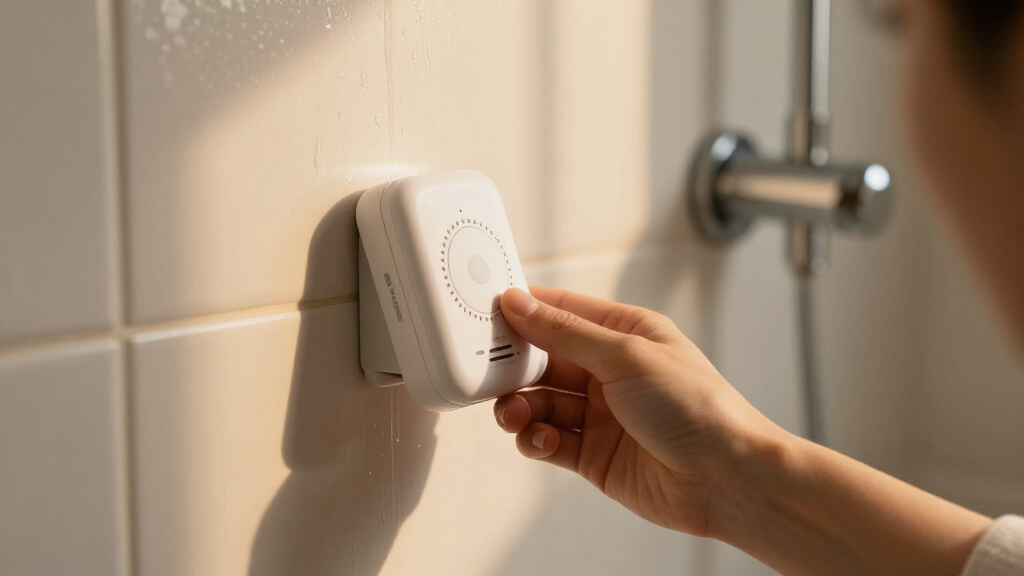
- Tub or shower: outside the regular splash zone, near seals and plumbing access.
- Upper floors: cover fixtures above finished rooms where a slow leak can damage ceilings.
Kitchen
- Sink cabinet: beneath supply valves, drain joints and disposal connections.
- Dishwasher: behind or beside the unit, closest to its inlet and drain hoses.
- Refrigerator: near the water-line connection for the dispenser or ice maker.
- Hidden plumbing: cover low cabinet points where water will collect before escaping.
Basement
- Sump pump: beside the pit or discharge connection, away from normal pump spray.
- Water heater: close to the tank, drain pan and pressure-relief discharge area.
- Washing machine: behind the unit near hot and cold supply hoses.
- Foundation walls: place along recurring seepage paths and at the room’s low points.
Five moves to reliable placement
Installation is less about covering every square metre and more about finding the first predictable contact point between escaping water and the floor.
Trace every source
List fixtures, appliances, valves, hoses, tanks, pumps and walls with a history of dampness.
Predict the path
Check floor slope, cabinet edges and drains to see where the first escaping water will move.
Place at first contact
Set the sensing contacts near the likely origin or the earliest downstream collection point.
Remove false triggers
Shift away from shower spray, mopping water, condensation and routinely wet surfaces.
Test the full alert
Verify the sensor, hub, phone notification and any automatic shutoff response together.
Low enough to detect. Accessible enough to maintain.
Floor-contact probes should sit where shallow water reaches them quickly. Wall-mounted, cable-probe and humidity models must follow their manufacturer’s height guidance. Never bury a sensor so deeply behind an appliance that testing or battery replacement becomes unrealistic.
From a local alarm to a connected safety system
The most useful upgrade is not novelty—it is faster notification, broader sensing and a response that continues when nobody is home.
Wireless alerts
Wi-Fi, Zigbee and Z-Wave models can send real-time notifications through a hub or mobile app.
Multi-function sensing
Temperature, humidity and freeze warnings reveal conditions that can precede pipe failure.
Automatic shutoff
Compatible systems can trigger a connected valve and stop the supply while an alert is sent.
Pattern analysis
Advanced systems can flag unusual usage or persistent drips before visible flooding occurs.
Match the sensor type to the risk
No single feature replaces good placement. Choose a device that can physically sense the target area and reliably tell you when action is needed.
| Sensor type | Best use | Remote alert | Freeze / humidity | Placement verdict |
|---|---|---|---|---|
| Basic floor alarm | Visible, frequently occupied rooms | ✗ No | ✗ Rare | Good beneath sinks and beside toilets when someone can hear it. |
| Wi-Fi sensor | Remote phone alerts without a dedicated hub | ✓ Yes | ~ Model dependent | Strong choice for water heaters, appliances and second homes. |
| Zigbee / Z-Wave | Whole-home networks and automation | ✓ Via hub | ~ Often | Ideal for many coordinated sensors and automated responses. |
| Cable-probe sensor | Long walls, tanks and wide appliance zones | ~ Varies | ~ Varies | Best where a single point sensor could leave blind spots. |
| Sensor + shutoff | High-consequence leaks and unattended homes | ✓ Yes | ~ Often | Most proactive option when valve compatibility is confirmed. |
A silent sensor still needs attention.
Leak sensors protect only when their contacts are clean, their batteries have power and their alerts reach the right destination. Pair technology with regular inspection of hoses, seals, valves and drains.
Use the manufacturer’s test method and confirm the audible or app alert.
Replace proactively unless the device specifies a different schedule.
Make sure mops, storage boxes or appliance movement have not displaced it.
Look for corrosion, dampness, cracked hoses and failed seals around every covered source.
How one early signal prevents a larger loss
Your placement checklist
Cover every major water source: toilets, sinks, dishwashers, refrigerators, washing machines, pumps and heaters.
Follow the water path: place contacts at the likely origin or the first low point water will reach.
Choose useful connectivity: remote alerts, freeze sensing and shutoff automation improve response time.
Keep devices accessible: maintenance should never require moving heavy equipment or dismantling cabinets.
Layer your defenses: sensors complement—not replace—routine plumbing inspection and preventive maintenance.
Where to put water leak sensors for maximum early warning
Water leak sensors are most effective when placed near the sources of potential leaks. Think about the places where water moves, drips, or might spill. In bathrooms, place sensors close to toilets, under sinks, and near showers. For kitchens, focus on under the sink, behind dishwashers, and near refrigerator water lines. Basements demand sensors along walls, near sump pumps, and around water heaters.
For example, a homeowner installed a sensor behind their washing machine—a common leak point—and caught a slowly developing hose crack before water flooded the laundry room. Timing matters. Position sensors where leaks are likely to start or spread.
As an affiliate, we earn on qualifying purchases.
Top spots in your bathroom, kitchen, and basement to catch leaks early
- Bathrooms: Near toilets, especially behind or to the side; under sinks where pipes can corrode or loosen; around bathtubs and showers where seals can fail.
- Kitchens: Under the sink, especially where hoses connect to the dishwasher or garbage disposal; around refrigerator water lines; near any plumbing fixtures that see frequent use.
- Basements: Along basement walls where seepage is common; near sump pumps; next to water heaters and washing machines.
Choosing these locations isn’t just about catching leaks—it’s about understanding the implications. Placing sensors where leaks are likely to originate or spread allows for early detection, which can prevent extensive water damage, mold growth, and structural deterioration. For instance, a sensor behind a dryer in the basement isn’t just about catching a leak—it’s about stopping water from seeping into the foundation, which could compromise the entire structure. Strategic placement reduces false alarms from areas less prone to leaks, saving you from unnecessary stress and maintenance costs.
As an affiliate, we earn on qualifying purchases.
How to position your leak sensors for the best results
- Identify high-risk sources—appliances, fixtures, and walls prone to leaks. Recognizing these areas helps prioritize sensor placement, ensuring you’re alerted early when most vulnerable.
- Place sensors on the floor near these sources, but avoid areas where water splashes regularly or high humidity might cause false alarms. This balance ensures sensors are both effective and durable.
- Mount sensors at a height recommended by the manufacturer—some are designed to sit on the floor, others attach to walls or cabinets. Proper mounting maximizes their sensitivity and lifespan, reducing the chances of missed leaks.
- Ensure sensors are accessible for battery changes and maintenance. Think about placement where you won’t forget or struggle to reach, which maintains their reliability over time.
For example, placing a sensor just behind a washing machine’s hoses not only catches leaks early but also provides peace of mind during long absences. Proper positioning minimizes false alarms from normal water splashes, while maximizing early warning capabilities—crucial for preventing extensive damage and costly repairs.
As an affiliate, we earn on qualifying purchases.
The latest tech in leak detection—what’s new and why it matters
Modern leak sensors now connect seamlessly with your smart home. Wi-Fi, Zigbee, and Z-Wave protocols let you receive instant alerts on your phone. Some models combine leak detection with temperature, humidity, and freeze warnings—crucial in winter to prevent frozen pipes from bursting. Wireless, battery-powered sensors are easier to install and last 2-3 years on a single charge.
Recent advances include AI systems that analyze leak patterns over time, predicting issues before they happen. Imagine a sensor that notices a slow drip, learns from it, and warns you to check your plumbing before a leak even starts. This proactive approach can save thousands by preventing minor issues from escalating into major disasters. These innovations are not just about convenience—they fundamentally improve the safety and resilience of your home’s plumbing system, reducing repair costs and water waste.
As an affiliate, we earn on qualifying purchases.
Key facts about water leak sensors you should know
| Fact | Details |
|---|---|
| Cost savings | Leak sensors can prevent damages worth thousands, often costing under $50 each. Proper placement ensures you get the maximum return on your investment by catching leaks early. |
| Detection speed | Most sensors alert you within minutes of a leak starting, allowing rapid response that can prevent extensive damage and mold growth. |
| Battery life | Typically 1-3 years, depending on use and model. Regular testing and timely battery replacement are essential to maintain their effectiveness, especially in critical areas. |
| Smart compatibility | Many work with Alexa, Google, or Apple platforms, enabling integrated alerts and automation. This connectivity amplifies the protective benefits, ensuring you’re notified instantly regardless of your location or device. |
Your top questions about placing water leak sensors answered
- Where exactly should I put sensors? Near toilets, under sinks, behind appliances, along basement walls, and near sump pumps. Placing sensors at these key points increases the likelihood of early leak detection, minimizing potential damage.
- How many sensors do I need? One per high-risk spot is ideal, but larger homes or complex plumbing systems may require additional sensors to ensure comprehensive coverage. Overlapping coverage can prevent blind spots where leaks might go unnoticed.
- Are smart sensors worth it? Absolutely—especially for real-time alerts and automation integration that catch leaks early. They provide peace of mind and can be programmed to trigger other safety measures, like shutting off water supplies automatically.
- How do I keep sensors working well? Test regularly, replace batteries yearly, and keep them clean and dust-free. Proper maintenance ensures sensors respond accurately when needed, avoiding false negatives or positives.
- Will sensors prevent all water damage? No device can guarantee complete safety—regular inspections, maintenance, and proper placement complement sensor use for the best protection. Combining multiple strategies creates a robust defense against water disasters.
Conclusion
Correct placement makes all the difference. With a strategic approach, your water leak sensors become silent guardians—detecting trouble before it turns into disaster. Think of them as your home’s early warning system, giving you peace of mind with every drop.
Remember, no system is perfect. Pair sensors with regular checks and maintenance. Your smart home can be a fortress—protecting what matters most, one leak at a time.
Evergreen bestsellers Picks
bestsellers
As an affiliate, we earn on qualifying purchases.