
TL;DR
Open a free Amazon Business account
Business pricing, bulk buying and tax-exempt orders.
Create a free accountAs an affiliate, we earn on qualifying purchases.
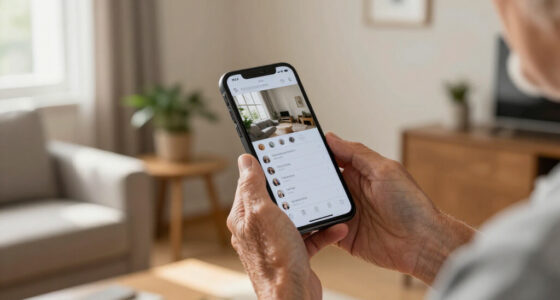
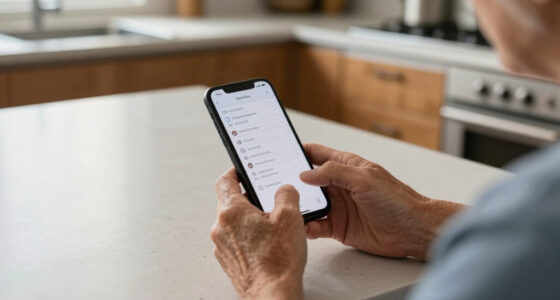
Assistive Access in iOS 17 simplifies the iPhone interface by limiting apps and customizing controls. It’s ideal for making the device more accessible for older adults, reducing overwhelm and boosting confidence.
Assistive Access in iOS 17 turns the iPhone into a simple, focused device tailored for older users.
You can create multiple profiles, each with only the essential apps and controls your parent needs.
Customize font sizes, icon styles, and display settings to boost visibility and ease of use.
Pair Assistive Access with other accessibility features like VoiceOver or Magnifier for an even smoother experience.
Switching between profiles or disabling Assistive Access is quick, making it adaptable as needs change.
How to Simplify an iPhone for an Older Parent Using Assistive Access
Turn a crowded smartphone into a focused, reassuring tool with large controls, selected apps and fewer opportunities for accidental taps. The goal is simple: make everyday calls, messages and safety features easier to find—and easier to trust.
Assistive Access is built into compatible iPhones running iOS 17 or later.
Begin with Phone, Messages and one essential safety or daily-use app.
A focused layout can build confidence without changing device performance.
Only chosen apps and controls remain prominent.
Clearer targets can reduce missed or accidental taps.
The feature simplifies the experience, not the hardware.
Apps and settings can be adjusted as needs evolve.
Complexity down. Confidence up.
Assistive Access creates a pared-down iPhone experience for someone who finds small icons, dense menus or too many choices intimidating.
Keep the device focused
Show the apps your parent uses and remove unnecessary visual clutter.
Choose daily essentials
Prioritize calling, messaging, photos, health or emergency needs.
Increase visibility
Use larger text, clear icons and display settings suited to their vision.
Add supporting tools
Combine it with Siri, VoiceOver, Magnifier or Sound Recognition.
Adapt over time
Review the setup and add functions gradually as confidence grows.
From busy screen to calm routine
Set it up alongside your parent. Their preferences—and a short practice session—matter as much as the technical choices.
Settings
Start from the standard iPhone interface.
Accessibility
Find Apple’s built-in accessibility options.
Assistive Access
Tap the feature and begin the guided setup.
Add key apps
Include only genuinely useful daily functions.
Layout & text
Favor visibility, contrast and easy tap targets.
Start & rehearse
Try a call, message and exit process together.
Simplify around real life—not every possible feature
The strongest setup reflects what your parent actually does: who they call, what they read and which tasks must feel effortless.
Remove decision noise
Fewer visible choices can lessen cognitive overload and make the next action more obvious.
Make targets forgiving
Large text and controls are easier to see and tap, especially with reduced vision or dexterity.
Turn actions into routines
Practice calling a loved one, reading a message and getting help until each path feels familiar.
Assistive Access vs. Guided Access
They solve different problems: one simplifies an ongoing multi-app experience; the other keeps the iPhone inside one app for a session.
| Feature | Assistive Access | Guided Access |
|---|---|---|
| Primary purpose | Simplifies the overall interface and selected activities. | Temporarily restricts the device to one app. |
| Multiple apps | ✓ Yes — selected supported apps can remain available. | ✗ No — one app is used during the session. |
| Interface style | ✓ Simplified — prominent controls and reduced complexity. | ~ Standard app — selected controls can be limited. |
| Best for | Ongoing everyday use by someone who benefits from a calmer experience. | Keeping attention on a single task or preventing navigation away. |
| Customization | Choose available apps and configure supported app experiences. | Limit buttons, touch areas, motion or time for one session. |
Optimize what matters most
These bars are a practical setup priority guide—not measured performance statistics. Start at the top and test every choice with your parent.
Use only essential apps
Begin with a short list. Add Photos, Health or other tools only when they support a real routine.
Choose large, legible presentation
Increase text size and use an uncluttered layout with distinct, easy-to-tap controls.
Enable voice assistance where helpful
Siri can reduce navigation by letting your parent place calls or request information by voice.
Write down a tiny playbook
Use clear steps for calling, messaging, charging and requesting help. Keep it near the phone.
Setup priority map
Relative attention to give each part of the initial configuration.
Best practice: configure the smallest useful setup, observe what causes friction, then refine it.
Combine features for a smoother experience
Assistive Access provides the simple foundation. Add only the accessibility tools that address a specific hearing, vision or dexterity need.
VoiceOver
Provides spoken descriptions and feedback for someone who benefits from screen reading.
Magnifier
Uses the camera to enlarge labels, medication instructions and other small print.
Sound Recognition
Can notify the user about selected sounds such as alarms or doorbells.
Siri
Supports hands-free calls and requests, reducing the need to navigate controls.
If something goes wrong
Stay calm and return to the simplest working configuration. The full interface may feel busy when Assistive Access is exited, so guide the transition.
Use the configured exit process
Follow the on-screen exit method and enter the Assistive Access passcode established during setup.
Review the configuration
If an app is missing or confusing, return to Assistive Access settings and adjust what is available.
Restart, then seek support
Restart the iPhone if needed. For device-specific problems, consult Apple Support or a trusted helper.
What is Assistive Access — and why it’s a game-changer for older users
Assistive Access is a new feature in iOS 17 that simplifies the iPhone interface by showing only the apps and controls you choose. Think of it as creating a custom, pared-down version of the phone tailored for someone who doesn’t want to deal with menus, notifications, or endless icons. This focused approach helps reduce cognitive overload, which is especially important for seniors who may find complex interfaces intimidating or confusing. By limiting options, it not only makes the device easier to use but also minimizes the risk of accidental taps on unintended apps, which can be frustrating or even unsafe. The implication is that your parent can confidently use their phone without feeling overwhelmed, fostering independence and reducing reliance on others for basic tasks. However, this simplicity comes with a tradeoff: users won’t have immediate access to all functions unless you add them back, so it’s essential to consider which apps and controls are most important for their daily needs. Ultimately, Assistive Access helps balance usability with safety, making technology accessible without sacrificing essential features.

TTQ 4K 60fps Vlog Selfie Monitor Screen, Magnetic Phone Vlog Selfie Monitor
- 4K 60fps Recording: High-quality, smooth video capture
- Magnetic Compatibility: Snaps securely onto compatible phones
- Self-Powered Design: No batteries needed, powered by phone
As an affiliate, we earn on qualifying purchases.
As an affiliate, we earn on qualifying purchases.
Step-by-step: How to set up Assistive Access in just a few minutes
- Open Settings and tap Accessibility.
- Select Assistive Access.
- Tap Get Started and follow the prompts to create a new profile, which acts as a personalized, simplified environment.
- Choose the apps and controls you want visible — like Phone, Messages, and Emergency. Carefully select only the essentials to avoid clutter and confusion.
- Adjust font size, icon size, and display options for maximum visibility and ease of tapping, which can significantly reduce frustration.
- Save your profile and switch to it whenever needed. Remember, you can modify or add apps later as your parent’s needs evolve.
This setup takes just a few minutes but can dramatically improve your parent’s experience by making the device more manageable. Creating multiple profiles allows you to tailor the interface as their needs change, ensuring ongoing usability and comfort.

Large Button Phones for Seniors, Land Line Phones for Elderly House Phone
- Large, Oversized Buttons: Easy to see and press for seniors
- High-Contrast Dialing: Black numbers on white background
- One-Touch Speed Dial: Quick access to important contacts
As an affiliate, we earn on qualifying purchases.
As an affiliate, we earn on qualifying purchases.
Compare Assistive Access to Guided Access — what’s the difference?
| Feature | Assistive Access |
|---|---|
| Purpose | Creates a simplified, customizable interface with selected apps and controls, allowing for ongoing adjustments and multiple profiles that suit different needs or users. |
| Number of apps | Multiple apps can be included, and controls can be tailored for each, providing flexibility for various routines or preferences. |
| Switching profiles | Easy to create and switch between different user profiles, making it adaptable for different situations or users within the same device. |
| Lock into one app | No, it allows access to multiple apps but keeps the overall interface simple, unlike Guided Access which locks into a single app for a session. |

Assistive Technology Specialist Appreciation Back to School PopSockets MagSafe PopGrip for iPhone
- Design Theme: Retro Vintage Assistive Technology Specialist
- Target Audience: Women, family, friends, colleagues
- Occasions: Retirement, graduation, birthdays
As an affiliate, we earn on qualifying purchases.
As an affiliate, we earn on qualifying purchases.
Maximize ease: How to make Assistive Access even more user-friendly
- Use large icons and high-contrast colors for better visibility, which is crucial for seniors with visual impairments or limited dexterity. These adjustments help prevent missed taps and reduce eye strain.
- Enable Siri and voice commands for hands-free control. This allows your parent to initiate calls or send messages without navigating tiny icons, boosting independence and safety.
- Set up a dedicated profile with only the essential apps visible. This focused environment minimizes distractions and helps your parent navigate confidently.
- Practice walking your parent through the setup, demonstrating each step patiently to build familiarity and confidence.
- Keep instructions simple and clear — perhaps written down or illustrated — to reinforce learning and independence over time.

Super Easy iPhone 17 Manual for Seniors & Absolute Beginners: Learn How to Turn On, Set Up, and Use Your iPhone 17 Step by Step – Large-Print Guide With Video Lessons to Stay Connected & Independent
As an affiliate, we earn on qualifying purchases.
As an affiliate, we earn on qualifying purchases.
What else can you combine with Assistive Access for a smoother experience?
Assistive Access works well with other accessibility features like VoiceOver for spoken feedback, Magnifier for enlarging small text or images, and Sound Recognition to alert your parent when certain sounds happen — like doorbells or alarms. Combining these features creates a comprehensive support system that enhances confidence and independence. For example, pairing VoiceOver with Assistive Access ensures your parent can hear descriptions of what’s on the screen, which is especially helpful for those with visual impairments. Magnifier can help read small print on medication bottles or labels, reducing frustration and increasing safety. Sound Recognition can notify them of important sounds they might otherwise miss, like a smoke alarm or doorbell, making the environment safer. The tradeoff is that integrating multiple features requires some initial setup and understanding, but the payoff is a highly tailored experience that addresses specific challenges, making everyday use smoother and more secure.
Troubleshooting: What to do if things go wrong
If your parent struggles to exit Assistive Access or if something isn’t working, don’t worry. You can disable the profile easily by going back to Settings > Accessibility > Assistive Access and turning it off. Restart the device if needed. It’s important to understand that switching back to the full interface restores all features and apps, which might be overwhelming at first but allows more flexibility as your parent becomes comfortable. This ability to toggle between simplified and full modes ensures you can adapt the device to their evolving needs, balancing safety with functionality. If issues persist, consider resetting the profile or consulting Apple Support for specific troubleshooting tailored to your device’s setup, ensuring a seamless experience for your loved one.
Frequently Asked Questions
Can I customize Assistive Access for different family members?
Absolutely. You can create separate profiles for each person, tailored to their needs, and switch between them easily.Will enabling Assistive Access slow down my iPhone?
No. It mainly adjusts the interface, so your device’s performance remains unaffected.Is Assistive Access available on older iPhone models?
It requires iOS 17 or later, so recent models like iPhone SE (2022), iPhone 12, 13, 14, and newer are compatible.How do I get my parent to use Assistive Access confidently?
Start by setting up a simple profile together, then practice navigating it with clear instructions. Keep it relaxed and patient.Can I turn off Assistive Access once it’s set up?
Yes, simply go to Settings > Accessibility > Assistive Access and toggle it off or select a different profile.Conclusion
Transforming an iPhone into a user-friendly device for an older parent doesn’t require tech expertise. With Assistive Access, you can craft a simple, safe, and empowering experience. Think of it as giving your loved one a device that feels designed just for them — easy, approachable, and full of confidence. The image of a senior happily tapping their big, colorful icons or asking Siri for help says it all.Labor Day sales Picks
labor day deals
As an affiliate, we earn on qualifying purchases.